Showing posts with label palette. Show all posts

Wednesday, 3 August 2016

A wedding!

On Halloween, Chris and I got married.  It was the most wonderful day of my life:


He looked utterly spiffing in his 3 piece tweed suit, and I felt like a princess in my Georgette wedding dress. It could not have been more perfect. I wore pearls in my hair, made by Mummy:


My bridesmaids wore red satin and I made them a simple necklace and matching earrings using Swarovski Elements in Siam paired with Silver Duracoat Delicas:


My flower girls had silver bracelets with matching Swarovski Hearts dangling, but I forgot to take a photo of them because I'm an idiot!!!

Mummy's necklace was spectacular!  She bought a pattern from BeAdInfinitum called Starburst Galaxy and made it in Swarovski Pearls and made a few adaptations to make it perfectly perfect for the wedding:

Look how many she's made! 
#beading #beadwork #beadweaving #craft #seedbeads #handmade #wedding #pearls #cream #beadinfinitum


How gorgeous is that??!!  She wore it with petrol blue silk and looked amazing!

All in all, we had a wonderful day and it was glorious bringing our craft into it - not least because it saved us plenty of pennies!


Saturday, 9 May 2015

Mummy's Makes: Earrings Galore!

Mummy has been on a bit of an earring frenzy recently.  We wanted some cheaper, smaller items available in our Etsy shop because we both felt that we want to be more accessible to all purse sizes.  No matter what price we sell things for though, only sterling silver or gold fill ear hooks will suffice because who wants earrings that turn your ears green or itch like crazy by the end of the day?!

I had some Swarovski Heliotrope rivolis left over from my Necklace & Earrings Set so I gave them to Mummy and she concocted these gorgeously simple earrings adapting Jean Power's 3D Geometric Triangles to bezel the rivolis using silver duracoat seed beads!  Gorgeous!

These are some simple 14mm Swarovski emerald rivolis simply bezelled (again using silver duracoat seed beads), to let that rich green sing.

She also made a pair using gold seed beads and those delightful green AB 15s to add some interest to the rivolis.

Some gorgeous 16mm Swarovski Heliotrope rivolis simply bezelled using gunmetal seed beads.  I honestly can't believe the difference between these and the first ones in this post.  The heliotrope is really darkened and more indigo, whereas the ones at the top seem much more purple.

These cute little earrings were made using Swarovski Cosmic Squares in Crystal and some Swarovski pearls.  I love them and may have something similar for my wedding in October!

Again, Swarovski Cosmic Squares in Crystal but the Aqua AB delicas look almost denim coloured in daylight and make these earrings seem much more 'everyday war'.  I really love these for their chic simplicity.

A simplified version of her Crystal Triangle Earrings, I love these for the addition of the 2AB bicones at the corners of the triangles.  

And then finally this bad boy!  Rather than make a pendant for a necklace, Mummy decided that this Swarovski Golden Shadow stepped rectangle would make a perfect medal style brooch/lapel pin.  Of all the items she has made recently, I love this the most.  It is so unusual and so stylish that I almost wished I wore suits to work so I could make me one of these!

All of the above are available in our etsy shop.

Saturday, 2 May 2015

Geometric 3-4-4 Bracelet in Gold & White

I had the urge recently to make a bracelet using Jean Power's Geometric 3-4-4 pattern that comes with the Geometric Series Set.  I decided to go way out of my comfort zone and use gold and white - not a colour combination I have ever used before! I went for plain white opaque and then the gold duracoat delicas to add some seriously decadent glamour!

This is the finished product:


It starts with the first triangle...  Here I needed some second opinions of the white and gold combination, which I showed to pretty much everybody!  I didn't want the colour combo to be dull, just chic - not something I'm used to having to think about with my usual work!! 

Once I'd made two of the power puffs, it was back out for more opinions.  I really wasn't confident with my colour choices because these are two colours I hardly ever go to.

Slowly the bracelet grew...

...and grew some more
 After a good 30g of beads and two weeks of work, this gorgeous bracelet was finished!  As you can see, I made it into a bracelet with a magnetic clasp as I wanted it to sit closer to the wrist than a bangle would.

The clasp is pretty well camouflaged by the power puffs, which I'm pleased about as I didn't want it to be conspicuous or dramatically take away from the gorgeous design that Jean has given us.

 This photo shows how the bracelet looks on with the gold triangles pointed outwards.  I think I prefer it this way for some reason - don't know why though!

So there it is, my latest make.  Hope you like it.

It is available in my etsy shop.


Monday, 27 April 2015

Ultra Blue Swarovski Triangle Necklace

I've been making so much big jewellery recently that I fancied a bit of a change so I decided to make a pendant inspired by Jean Power's Heroine Necklace.  

This is what I've made.


I bought a 14mm Swarovski Ultra Blue rivoli and used Jean's method of bezelling (not sure I'll ever go back to doing it the old way to be honest!) and then had to figure out the maths to make the triangle even and integral to the bezel.  Lots of trial and error as maths really isn't my strong suit!I used silver duracoat delicas and silver duracoat seed beads in size 15.

The triangle didn't look great until I zipped the edges together and then it became a very solid and firm triangle.  In this shot you can see how I was inspired by the clasp of the Heroine necklace, although this one is solid, rather than being a tremendously clever three way clasp!

I left the back of the rivoli open so that light can travel through it and make it shine.  Also, I quite like the back being blue, rather than the usual silver or gold foil!

I added a very small and simple square stitched bezel and sewed it closed with the sterling silver chain in situ so that it was tight around the chain, not so tight that the chain won't move, but tight enough that it won't slide off the end when putting it on and taking it off.

I hope you like this simple necklace.  It is Available in my etsy shop here.

Tuesday, 21 April 2015

Swarovski Heliotrope Necklace & Earrings

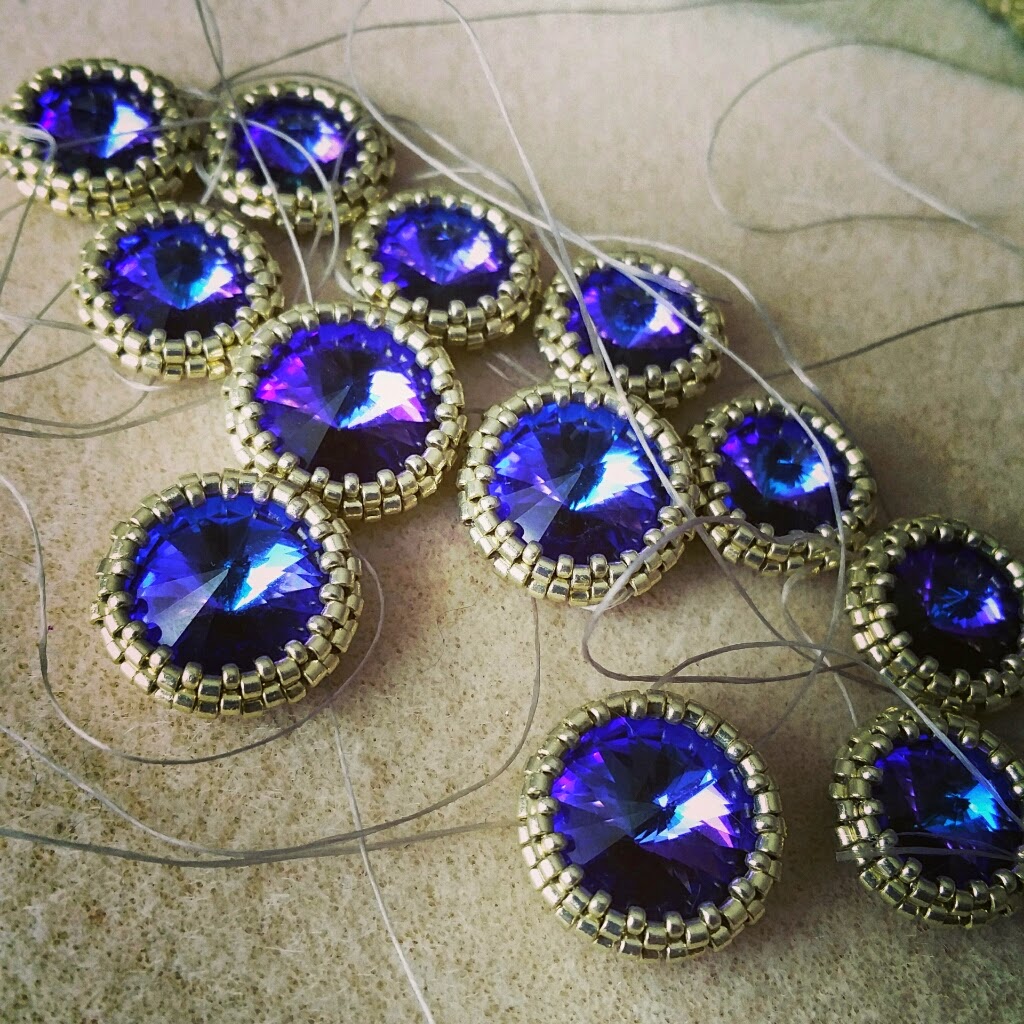
I've been concentrating so much on geometric beadwork for the last few years, after being heavily influenced by the unbelievably fabulous Jean Power and the work she inspired for the Contemporary Geometric Beadwork community started by Kate McKinnon, that I recently felt like I needed a bit of a break from structurally impressive beadwork. I didn't start off with this necklace and earrings set in my head.  Originally I was going to make an asymmetric and bonkers necklace inspired by Jean's Marun Bracelet but as I was bezelling all the rivolis, my plan changed and  I decided to make something a lot more traditional and basic.  I needed some serious sparkles in my life and some old school Hollywood glamour! 

I chose silver duracoat delicas for the simple reason that I wanted the rivolis to take centre stage.  I did think about other colours, but wanted simplicity of form and background colour to fade so those rivolis really sang.

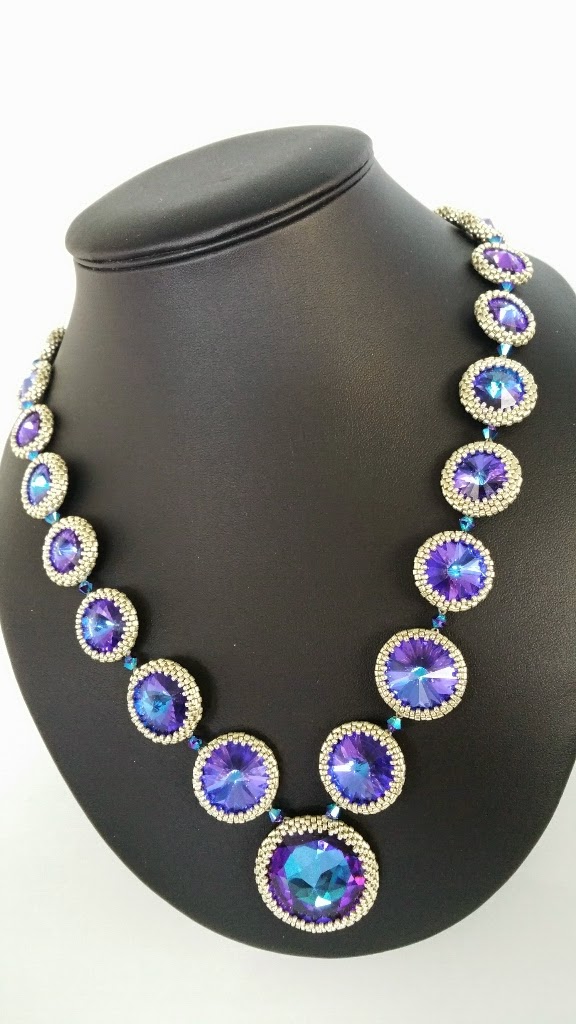
This is what I made:


It's an extraordinarily simple but uber glamorous necklace made using Swarovski Heliotrope rivolis in an assortment of sizes (from 12mm to 18mm), with a 27mm vintage Heliotrope Reverse Fancy Stone as the centrepiece.


I started by using Jean Power's obvious, but previously unthought of, method of bezelling smaller rivolis (soooo obvious now she's pointed it out here!)

It felt like a never-ending bezelling job!  Although I did find some Swarovski 2AB bicones in my stash that I had utterly forgotten about that went beautifully with the heliotrope rivolis.

I don't think I was even half way finished at this point!  (I also really need to do something about how messy my bead tray gets when I'm creating!)

Then came the moment to bead that gorgeous vintage Heliotrope Reverse fancy stone.  No picture can do justice to this bad boy!  It has some serious sparkle and the colour is just so intense.  I love it!

I started joining the rivolis using the bicones.  I used 3mm bicones round the back to join the 12mm rivolis and then switched to 4mm for all other sizes.

Halfway there and the threads are starting to be tamed!

I decided to use a sterling silver magnetic clasp on this necklace.  Mainly for aesthetics, but also I would be absolutely distraught if someone was wearing it and it got caught in something and ripped - it would be such a waste of a lot of work!

Look at all those rivolis!  Sparkles from every angle!

I enjoyed making the necklace so much I decided that I would make a pair of simple matching earrings.  I don't often make earrings - generally I find them too small and fiddly - but this time I knew that they would compliment the necklace perfectly.

One earring done...

And finally I made its match.  They're extraordinarily simple and pretty plain.  I really just wanted the rivolis and the bicones to do the talking.

It is available in my etsy shop here

Wednesday, 20 August 2014

Tangle Of Angles Bangle

Whilst I was off work, apart from the Raven Star Bangle, I also started another bangle. I decided to go way out of my comfort zone and make something out of colours that I personally never wear, silver lined bronze and gold lined cream.

 I call it the Tangle Of Angles Bangle because as I was making it, I decided to really push myself on the number of horns and gave it 14!  The most I'd ever done before that was 12 and my goodness it was such a tangle to bead!  The beadwork decided to be such a tangle that it was an absolute horror to bead and took about four decreasing rounds (and an obliging can!) for it to become round and bangle shaped.
 I also decided to add in an Elegant Guide Round (video) that Kate McKinnon came up with, which I hadn't played with before.  Even though I didn't embellish the EGR in any way, I am a definite convert to this technique and will never stitch in the ditch again!
 After I did one side with the EGR, I just suddenly lost interest.  My stitches had reopened and I just couldn't face doing any more beading for a few weeks so my amazing Mummy finished it off for me. 
 I think that going with the zigzag edges really completes the piece.  I always tend to go with straight edges or wings but I wanted to try something a little more elegant this time, lending itself to the colours (get me trying to do grown up beading!).

It is available in my Etsy Shop

Friday, 4 July 2014

Rainbow's Revenge Bangle

Yesterday, I finished the Rainbow Reverie Bangle, today I finished a bangle in the same colours but with a much more vicious look which I have called Rainbow's Revenge.


As I was beading up the Rainbow Reverie, I had an idea to put something in the ellipses between the wing joins.  I had hoped to put in some dyed howlite skulls but unfortunately I got my basic band size wrong so that had to go back into the thought processes for a little more stewing and I went back to my bead stash and found that the skulls had come with some absolutely fantastic dyed howlite claw spikes.


I just thought, hey, why not?! and started adding them.  Blooming tricky though - the more spikes I added, the more the thread caught on them!


 I love that the inside edge is the same as the Rainbow Reverie but the whole look has changed by the addition of those funky spikes!

 From the top you can see that the bangle is actually quite slender - the spikes are what give the bangle depth and punch.

I know it won't be to many people's tastes, it is pretty outrageous, and quite heavy, but I love it!  I love that it is bonkers and that the person who ends up owning it will never be able to type wearing it - or do much of anything practical!  It's a statement and it is totally unapologetic and that's what I like about it so much.  It is what it is and doesn't make any bones about it!

It is available to buy in my Etsy Shop

Wednesday, 2 July 2014

Rainbow Reverie Bangle

So I decided to make something with a little bit of colour.  As you know, I'm not good with colour at all and tend to steer clear, but I just wanted to really go for it, like I did with the Jester Cuff.  I didn't want to emulate it, more create a sibling for it and this is what I came up with:
 Originally I wanted to nestle dyed howlite skulls in each of the ellipses but I made the wings too long and the bellyband too thick for it to work.  I still have the beads on my tray though so...

I love how the view from the top looks so utterly simple and undulates so smoothly.
 
 And it was my first foray into using the luminous delicas.  They're a bit fab and very bright (you can't tell in this picture how bright that pink is, you'll just have to trust me!).
 Each wing tip is joined and the whole structure is extraordinarily solid. 

I hope you like it.

Available in my Etsy shop here.