Endless drivel on my love affair with beads. With pictures - does that make it okay?
Showing posts with label gifts. Show all posts
Wednesday, 10 August 2016
A Day With Jean
As a gift to Mummy for organising the wedding for me and Chris, we aarranged to have her spend the day with Jean Power in an intimate one on one lesson. Mummy is amazing and said that I could join them too though!
It was utterly amazing!!! She bought all her finished pieces along and we saw pretty much the entire contents of her gallery in real life, which was AMAZING!
We decided to choose three things and have a jam packed day of learning: Icos Pendant, Beaded Frames and the amazing Interlocking Crystals and it was outstanding how much we learned from her. The wedding was the best day ever but this came a close second!
This is mine and Mummy's work for the day:
Wednesday, 3 August 2016
A wedding!
On Halloween, Chris and I got married. It was the most wonderful day of my life:
He looked utterly spiffing in his 3 piece tweed suit, and I felt like a princess in my Georgette wedding dress. It could not have been more perfect. I wore pearls in my hair, made by Mummy:
My bridesmaids wore red satin and I made them a simple necklace and matching earrings using Swarovski Elements in Siam paired with Silver Duracoat Delicas:
My flower girls had silver bracelets with matching Swarovski Hearts dangling, but I forgot to take a photo of them because I'm an idiot!!!
Mummy's necklace was spectacular! She bought a pattern from BeAdInfinitum called Starburst Galaxy and made it in Swarovski Pearls and made a few adaptations to make it perfectly perfect for the wedding:

How gorgeous is that??!! She wore it with petrol blue silk and looked amazing!
All in all, we had a wonderful day and it was glorious bringing our craft into it - not least because it saved us plenty of pennies!
Friday, 4 April 2014
My Sister's 40th
Last year my big sister turned 40 (although she looks in her 20s, the cow!). I decided to make her a little something special for her birthday present. Something that she could wear to posh parties as a set or earrings for when she wanted to sparkle only a little.
Unfortunately I don't have a better picture than this so I'll have to talk you through what I did.
First of all, my sister is a gorgeous brunette with the most dazzling brown eyes that range from almost amber in some lights, to deep chocolate it others. She loves gold so I decided that the base colour should be Metallic Earth Batik Gold Iris (DB1010), using purple iris Charlottes as the detail and the stones are Swarovski in Amethyst.
First I bezelled the stones with the delicas and the charlottes. Around the large stone I "stitched in the ditch" to add an extra round of peyote and then a simple picot edge with the charlottes before adding a very simple bail and suspending it on what has to be my most perfect herringbone rope ever!
The earrings were simply bezelled and then hung on solid gold ear wires. No frills around the edge so that she could wear the earrings with anything and so that they didn't distract too much from the large oval stone necklace.
It's simple and understated but I like it and I know she does too.
Labels:
beading,
colour,
crystals,
delicas,
delicate,
earrings,
gifts,
herringbone,
necklace,
palette,
peyote,
Swarovski
Friday, 14 March 2014
Sabine Lippert's La Fleur Bracelet
I've done a Sabine Lippert pattern before (her Sweet Hearts pattern - these earrings beaded by Mummy) and found them easy to read and thought I'd give myself a bit of a challenge for a Christmas gift for one of my staff. After much deliberation (and I mean lots - Staff 3 is a delicate young thing and is girly in ways that I'm just not so this was a massive challeng!) I decided upon Sabine's La Fleur Bracelet (found in her book Beaded Fantasies). As I've never really made anything like this, and Staff 3 is a delicately coloured redhead I played it safe and used turquoise and bronze as the colourway.
The bracelet is made up of these darling little flowers made with 8mm Swarovski chatons (an absolute bugger to source in this country!) and tiny 3mm Swarovski bicones, with mainly size 15 seed beads! I've put a 50p next to the flower so you can see how small these blighters really are!
I made what seemed like a bazillion of the flowers - each one with thread left on, as you can see in the picture, with which you do the most sublime links with (Sabine really does take care that even the bits of the work you don't see are as beautiful as the bits you do).
Then it came to joining them together and working out if I needed to do another flower or if it was long enough. The pattern calls for 9 flowers (if I remember correctly), but Staff 3 is a tiny little thing so she needed only 8 flowers. Which is a good thing as I'm not much of a component maker - I get bored!
The finished bracelet.
All in all, it was a nice make. Not difficult by any stretch of the imagination, just blooming fiddly! I think I got through 2 or 3 needles per flower, and definitely needed my pliers on more than one occasion for pulling the needle through. It was a complete change of direction for me, the instructions were clear and concise and Sabine explains things very simply. It's not something I would wear, but I think it looks lovely on Staff 3 and I know that she likes it, which is what is important in a gift after all! I did buy another colour of chatons and matching bicones that would go with steel/gunmetal seed beads but I think it'll be a long old while before I make this pattern again. Life is far too short to repeat the same patterns when there are so many to try, as well as so many ideas in my own head!
Monday, 10 March 2014
Ombre Cabouchon Necklace
Real life has kind of taken over recently, in a very wonderful way, which has meant slightly less time to bead. I'm beginning to get back on the beading wagon, with ideas falling out of my head and onto paper. Until they get to needle and thread time, I thought I'd show you something I made late last year.
I was given a commission before Christmas to make a simple necklace with a layered onyx cabouchon and a simple ombre chain.
The lady I made it for wanted it as a gift for her Mum and she chose the cab, as well as the colours and the base design. She wanted the colours to bleed into each other and the clasp had to be beaded as well, as her Mum doesn't do well with any metals.
This is what I was given to work with - she wanted black to be the predominant colour in the chain with just a small bit of white showing either side of the pendant dropper:
My first step was to bead the cab. A nice easy job, but for my own hatred of matte beads - the more you handle them, the less matte they become (oils in skin etc) and they really bugger up the thread! I'm used to working with quite a lot of thread but have to use much smaller lengths as it frays more due to the rougher bead surface. The trouble is, matte beads really do lend themselves to many projects, and the matte beads against the highly polished surface of the stone was just beautiful.
Then came the rope itself! We opted for a simple 6 round herringbone rope, not twisted, not lazy, just a simple rope. This made the bleeding of the colours really work and although you can barely tell that the pinky pale brown turns into silver before heading into white, I really like this for the effect.
Here you can see the rope width against the cabouchon. Not too clunky and thick, but not so delicately thin that the cab looks ridiculously chunky! To be honest, it took a little while (and lots of samples!) to settle on this width because although I liked the eight round rope, it would have been far too chunky for the lady in question. I also always tend to veer towards the large and chunky rather than the thin and delicate.
And then we moved to the clasp. The loop is a simple peyote circle that I beaded and then joined the herringbone rope to and the toggle has a loop that loops through the continuous herringbone loop on the other end of the rope. I prefer to make my beaded clasps like this rather than a simple loop and toggle (or bigger bead) joined by a few beads because it makes them look a little more interesting and a touch more finished.
The completed piece:
I know the lady's Mum liked it Christmas morning and I hope you do too! It's very different from all the geometric work I've been doing recently.
I was given a commission before Christmas to make a simple necklace with a layered onyx cabouchon and a simple ombre chain.
The lady I made it for wanted it as a gift for her Mum and she chose the cab, as well as the colours and the base design. She wanted the colours to bleed into each other and the clasp had to be beaded as well, as her Mum doesn't do well with any metals.
This is what I was given to work with - she wanted black to be the predominant colour in the chain with just a small bit of white showing either side of the pendant dropper:
My first step was to bead the cab. A nice easy job, but for my own hatred of matte beads - the more you handle them, the less matte they become (oils in skin etc) and they really bugger up the thread! I'm used to working with quite a lot of thread but have to use much smaller lengths as it frays more due to the rougher bead surface. The trouble is, matte beads really do lend themselves to many projects, and the matte beads against the highly polished surface of the stone was just beautiful.
Then came the rope itself! We opted for a simple 6 round herringbone rope, not twisted, not lazy, just a simple rope. This made the bleeding of the colours really work and although you can barely tell that the pinky pale brown turns into silver before heading into white, I really like this for the effect.
Here you can see the rope width against the cabouchon. Not too clunky and thick, but not so delicately thin that the cab looks ridiculously chunky! To be honest, it took a little while (and lots of samples!) to settle on this width because although I liked the eight round rope, it would have been far too chunky for the lady in question. I also always tend to veer towards the large and chunky rather than the thin and delicate.
Getting the rope even on both sides, but still random looking was an absolute nightmare! Not a very good picture below, you can see the warped square found in Geometric Beadwork by Jean Power that I used to hang the cabouchon. Because we only wanted a small amount of white beads to peep out either side on the rope, I thought Jean's ingenious design was the way forward.
And then we moved to the clasp. The loop is a simple peyote circle that I beaded and then joined the herringbone rope to and the toggle has a loop that loops through the continuous herringbone loop on the other end of the rope. I prefer to make my beaded clasps like this rather than a simple loop and toggle (or bigger bead) joined by a few beads because it makes them look a little more interesting and a touch more finished.
The completed piece:
I know the lady's Mum liked it Christmas morning and I hope you do too! It's very different from all the geometric work I've been doing recently.
Sunday, 7 October 2012
Paula's Chakra Necklace
So I took a small break from beading after the momentous piece that is the Heroine Necklace to let my fingers recover and my hands stop being claws!
I was commissioned to make a Chakra Necklace from Rob to Paula, Xander's masseuse. Xander has been going to see her every other week for the past couple of years and her massage is amazing. She is absolutely astounding and specialises in soothing massage for kids with all sorts of disabilities, not just autism. Her patience is amazing and Xander sleeps brilliantly after each session. Over the years we've become friends and often have dinner together. Rob decided he wanted something beautiful for her birthday and asked me to make a piece that I would not make again so that it was completely unique to Paula. He wanted to incorporate chakra colours so that it had meaning for her and the base colour to be a muted copper or bronze.
This is what I came up with:
In this photo you can see the reverse of the rivolis and just about make out Sabine's very clever way of bezelling so that the stones are safe in their little cocoons but the front shows as much of the colour and sparkle as possible. The bezels look pretty and show off much more of the stone than the usual peyote bezel that I use and are blooming quick to make - most of the time! Getting the stone to sit in and close the netted back up is quite fiddly, especially seeing as the netted flaps want to leap open when adding the row of 15s round the centre! I'm pretty certain that this is more to do with my tension rather than the design - I'm a very tight beadweaver and like to keep everything quite stiff so that I know nothing will slip out!
As I was making the herringbone rope I decided that it looked really odd with both sides plain herringbone so every 20 rows I inserted a couple of the 3mm firepolished rounds with a couple of the 15s either side but only on one side. I think this slight alteration in the rope gave the necklace a little more balance than if it had been plain both sides.
The side with the stones is completely plain and just a simple 4-bead herringbone rope.
Rob's coming to pick it up today and I really hope Paula likes it when she opens it on Tuesday.
I was commissioned to make a Chakra Necklace from Rob to Paula, Xander's masseuse. Xander has been going to see her every other week for the past couple of years and her massage is amazing. She is absolutely astounding and specialises in soothing massage for kids with all sorts of disabilities, not just autism. Her patience is amazing and Xander sleeps brilliantly after each session. Over the years we've become friends and often have dinner together. Rob decided he wanted something beautiful for her birthday and asked me to make a piece that I would not make again so that it was completely unique to Paula. He wanted to incorporate chakra colours so that it had meaning for her and the base colour to be a muted copper or bronze.
This is what I came up with:
I used 12mm Swarovski rivolis in Siam, Padparadscha, Sahara, Emerald, Sapphire, Heliotrope and Tanzanite and set them using 3mm bronze firepolished rounds, bronze 15s and Matte Metallic Dark Bronze delicas, adapting a technique used by Sabine Lippert in her book Beaded Fantasies.
Here you can see a close up of the stones and their settings:
In this photo you can see the reverse of the rivolis and just about make out Sabine's very clever way of bezelling so that the stones are safe in their little cocoons but the front shows as much of the colour and sparkle as possible. The bezels look pretty and show off much more of the stone than the usual peyote bezel that I use and are blooming quick to make - most of the time! Getting the stone to sit in and close the netted back up is quite fiddly, especially seeing as the netted flaps want to leap open when adding the row of 15s round the centre! I'm pretty certain that this is more to do with my tension rather than the design - I'm a very tight beadweaver and like to keep everything quite stiff so that I know nothing will slip out!
As I was making the herringbone rope I decided that it looked really odd with both sides plain herringbone so every 20 rows I inserted a couple of the 3mm firepolished rounds with a couple of the 15s either side but only on one side. I think this slight alteration in the rope gave the necklace a little more balance than if it had been plain both sides.
The side with the stones is completely plain and just a simple 4-bead herringbone rope.
Rob's coming to pick it up today and I really hope Paula likes it when she opens it on Tuesday.
Tuesday, 20 March 2012
Madrid and Jean Power's Faux Cro
It's been a month since I last posted because I have been so busy! I went on a trip to Madrid to see my baby brother and his lovely girlfriend which was utterly fabulous. I spent a lot of time in The Prado, mainly gasping at delight over the deliciousness that is Heironymus Bosch's The Garden Of Earthly Delights and enjoyed the newly restored Mona Lisa copy (although I don't really like it!). However, it was at Reina Sofia that my imagination was truly captured. I could have spent a whole week just wandering around and drinking in the amazing art on offer. I fell in love with Hans Hartung and Oskar Schlemmer (especially this and this). I loved seeing the Man Ray works, especially the original of this, a poster of which was on my bedroom wall for pretty much my entire teenage years! I saw Guernica, and all sorts of other Picasso works, lots of Miro and countless other awe inspiring works.
So you see, I have been so busy that to be honest I have only made one piece of jewellery since then - a Faux Cro bangle by Jean Power. I made it as a leaving present for my temp staff and I cannot begin to tell you how wonderful this pattern is to make up. Absolutely dreamy and you can do it whilst watching telly or listening to music and not really concentrating. Well, apart from when you get to the invisible join and then it's a little fiddly, but not overly so.
As you can only just see, it's in a very pale pink with a silver lined grey spiralling round endlessly. She is a pale, blue-eyed blonde so she wears lots of delicate colours like this, although I had to get lots of second opinions as I hardly ever use pastels or muted colours!
This picture is hardly any better but you can see that it's an actual proper bangle!
I am teaching Kathy tonight and I have so many ideas jotted down that I really ought to get myself in gear to make something blog-worthy!
Labels:
bangle,
beading,
delicate,
gifts,
Jean Power,
palette,
repetition,
seed beads
Friday, 3 February 2012
Beaded Beads
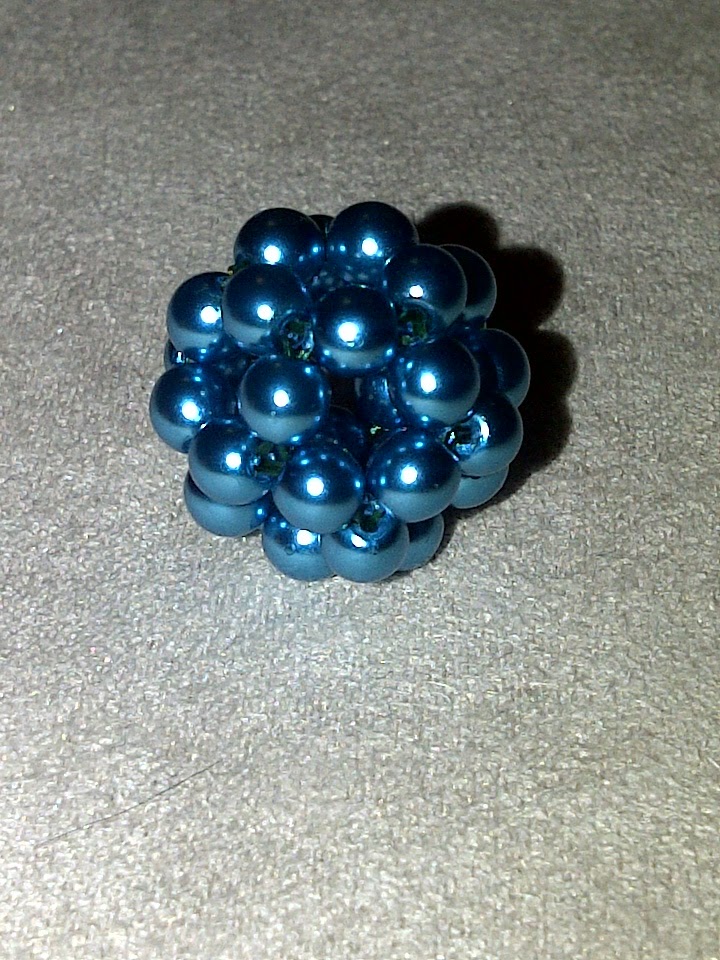
Lately I have been playing around with beaded beads. I thought I'd have a little go and see what I could make that were self supporting but that would also allow you to see the structure of the bead as well.
I started with the green bead at the back. It's made with some cheap Indian glass rounds and lots and lots of thread to keep these heavy beads still! Then I made another using Swarovski faceted rounds. I'm not much of an orange fan but thought it looked quite cute.
Then I tried again with some Swarovski pearls. This one is my favourite by far, possibly because I love the colour! I threaded this on some plain silver snake chain and turned it into a very simple necklace as a birthday present for one of the girls at work.
Then I moved on to Cindy Holsclaw's rather fabulous Disco Ball beaded bead and I absolutely loved it!
I had loads of leftover bicones in some pretty random colours so I thought I'd see how the Disco Ball beaded bead would translate to them and they really worked! As you can see, I didn't add the lace overlay so I had to go through each bead quite a few times in order for them to stiffen up.
But then what to do with all these random beaded beads I had made?!
A cute little charm bracelet worked wonders as yet another gift. Luckily she is a bit of a champion of colour so this was right up her alley!
I started with the green bead at the back. It's made with some cheap Indian glass rounds and lots and lots of thread to keep these heavy beads still! Then I made another using Swarovski faceted rounds. I'm not much of an orange fan but thought it looked quite cute.
Then I moved on to Cindy Holsclaw's rather fabulous Disco Ball beaded bead and I absolutely loved it!
I had loads of leftover bicones in some pretty random colours so I thought I'd see how the Disco Ball beaded bead would translate to them and they really worked! As you can see, I didn't add the lace overlay so I had to go through each bead quite a few times in order for them to stiffen up.
But then what to do with all these random beaded beads I had made?!
A cute little charm bracelet worked wonders as yet another gift. Luckily she is a bit of a champion of colour so this was right up her alley!
Tuesday, 31 January 2012
What To Do With All Those Leftovers: Bead Soup
Over the years I have become very lazy when I finish a project and usually end up putting all the leftover beads in a little bag and then just leave them in my drawer of randomness! I know I should sort them all out and get the beads back in their original boxes but that just seems so dreary when my head is already full of the next project!
So I decided that I would start working my way through these small bags of 'bead soup' and see what kind of things I could make to use them up - I can't extol the virtues of bead soup projects enough!
These two necklaces were my first attempt at getting rid of those bead soup bags. I started with a peyote base of random seed beads and just kept on embellishing until I couldn't fit a single bead more on there. I like the brown and green one more than the silver/red/black one but they both helped use up those pesky leftover beads.
This one was another bead soup leftover bag but just in red. I decided to make a simple Potowatomi chain in red seed beads and then embellished the toggle and loop clasp so that it would hang at the front. All the fizz helped disguise the clasp and used up some pretty ugly beads at the same time!
This one was a slightly different kind of leftovers necklace, in fact these seed beads were left over from the necklace at the very top of this page! I threaded a few beads on jump rings and then linked the jump rings to each other to make a cascade. It's not something I'll ever do again though because opening and closing all those blooming jump rings hurt my thumbs! I now have a huge respect for people who can sit and make chainmaille!
This was a small bag of shell spacer beads that Mum had left over. She thought they looked like Nestle's Smarties so made a simple peyote band with a picot edging and randomly added the shell beads. Gorgeous isn't it?
Another leftover soup necklace. I don't often use gold in my beading but was bought a load of gold and brown beads. My sister had this and said she wore it out with a posh evening frock and it looked fabulous.
Then I had a few more of the golds and browns left so I gave them to Mummy and she made a cuff.
This cuff was an experiment that went horribly wrong! There is nothing I like about this cuff at all! The bead soup didn't do justice to the amazing focal bead so it didn't last long - it was cut up and the beads were put back in a bead soup bag for another day. I include it only to show that not every bead soup project works!
These three cuffs are all made on the same theme - plain silver peyote base with a picot edge to complement the larger beads in the embellishment - perfect for when you don't have a huge amount of bead soup left!
Another red embellished cuff.
And finally, possibly my favourite of all my bead soup necklaces. This one was given to my Nanna, along with some matching but not the same earrings (of which I didn't take a photo). I love the bright purples with the deeper, richer iris beads and then every so often seeing a silver sparkle crystal poke out. The movement of this piece and the jumble of beads makes me laugh every time I see it because it really does force you to look at it and then follow the beads all the way round. It's a very chipper necklace and I know that Nanna wears it often.
Labels:
bead soup,
beading,
bracelet,
brick stitch,
crystals,
cuff,
gifts,
inspiration,
necklace,
netting,
palette,
peyote,
random,
RAW,
repetition,
seed beads,
Swarovski
Monday, 23 January 2012
Wedding Jewellery
The summer just gone one of my staff got married and she asked me to make her wedding jewellery, as well as gifts for the bridesmaids. We sat together and drew up some ideas and she had a good root through my finished pieces pile so she could get some ideas as well. She had four bridesmaids, each wearing a different colour of the same dress apart from the head bridesmaid (which was her Gran!).
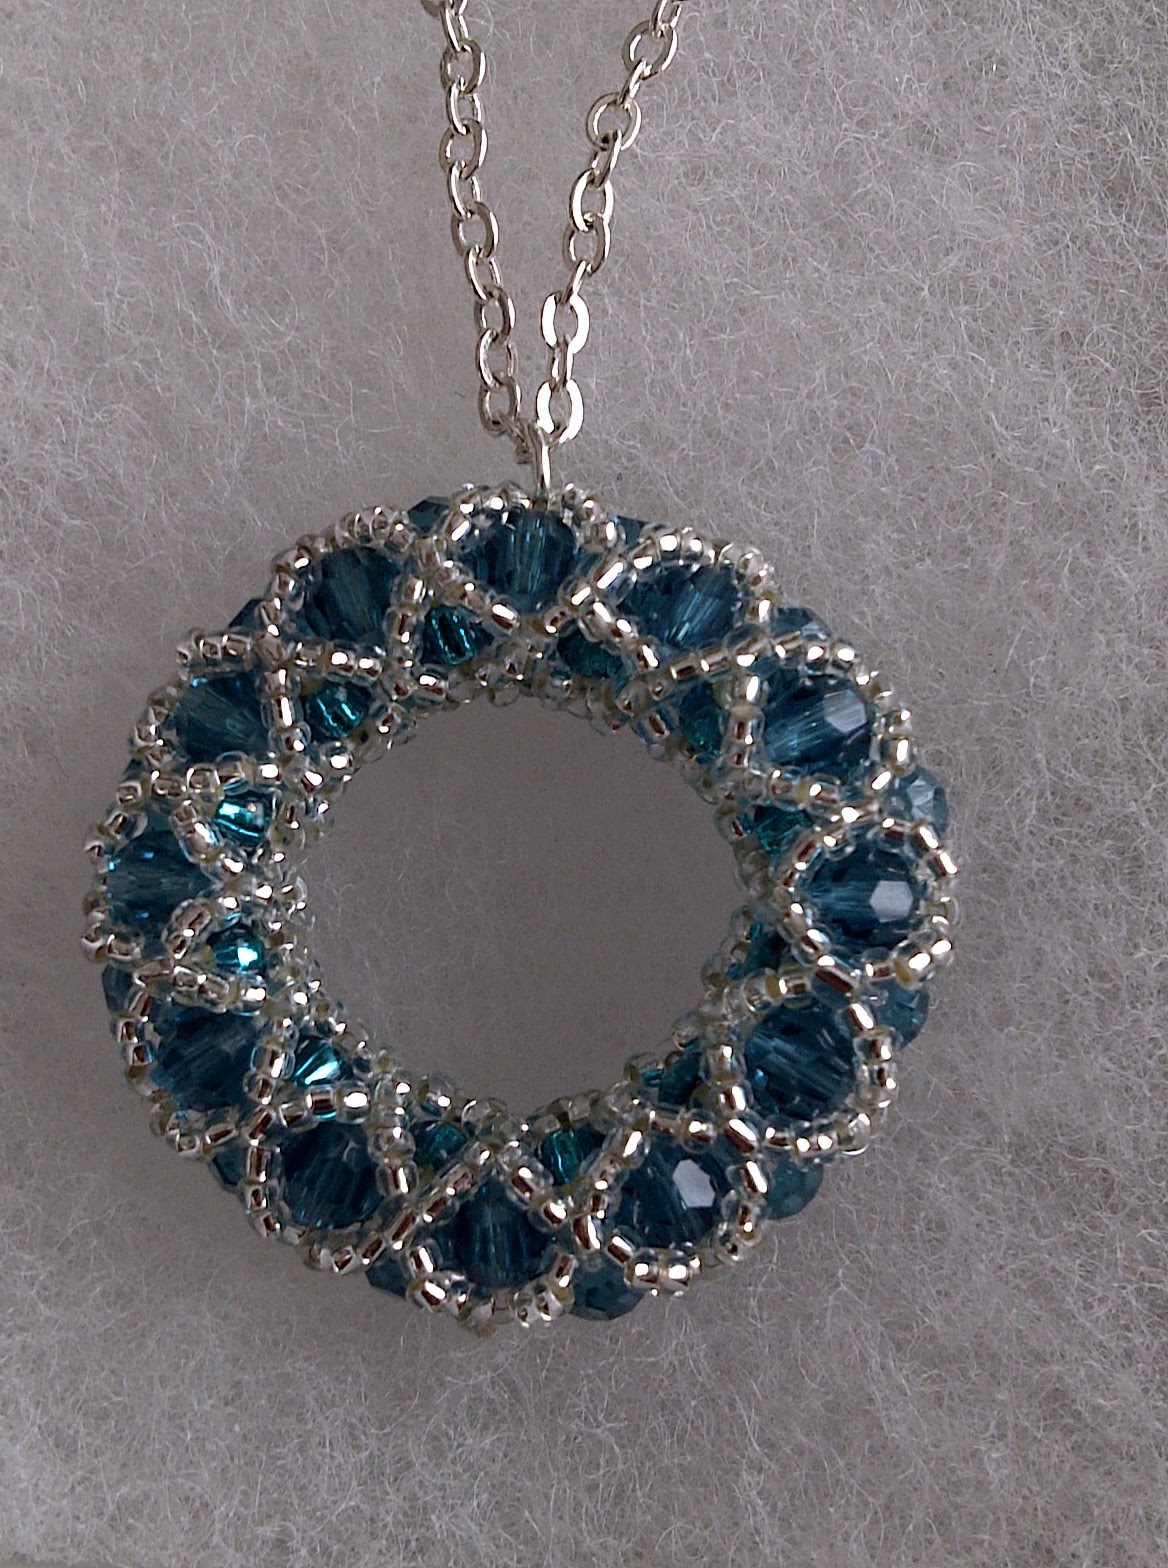
This is what I made for the bride to match her bouquet. It's a slightly enlarged Ring Nebula made with Swarovski Indicolite faceted rounds and tiny size 15 beads.
I simply popped it on a silver chain with a silver heart clasp for her.
For the bridesmaids I made simple beaded beads with large Swarovski faceted rounds and the used different colours for the lace overlay. My exceptional Mum came up with the pattern for this beaded bead and it is completely self-supporting.
Here you can really see the deep ruby overlay.
And this one in teal.
For the Gran maid of honour, she wanted me to make another of the Ring Nebulas as a brooch:
This time I used Light Amethyst Swarovski faceted rounds.
It was wonderful making wedding jewellery and I was so happy to be a small part of making her wedding day be what she wanted it to be. All of the bridesmaids spoke to me afterwards and said how much they loved their jewellery and one of the girls commissioned me to make a few pieces for her. Luckily she has quite bold taste so I really was able to let rip for her!
I made this asymmetric double spiral princess length rope with scores of firepolished beads and Swarovski crystals, as well as aventurine and amethyst chips for her.
In this view you can really see the spiral and how the colours peep out of the monochromatic bead soup soup. It is definitely not a stitch for beginners! It took quite a few stop and starts for me to get into the flow but once I got the rhythm of the stitch, it grew really fast .
This summer I have been asked by another of my colleagues to make her wedding jewellery. I can't wait to see what she has in mind! I'm hoping it'll be something really opulent and over the top! or maybe something refined but quite the statement like this:
This was another piece of wedding jewellery made by my Mum. She is so delicate in her work and is everything I strive to be. She is a huge inspiration to me and I hope one day I will be as good as she is.
Labels:
beaded bead,
beadinfinitum,
beading,
crystals,
delicas,
gifts,
inspiration,
netting,
palette,
pattern,
pearls,
peyote,
RAW,
repetition,
seed beads,
Swarovski
Subscribe to:
Posts (Atom)