I've been concentrating so much on geometric beadwork for the last few years, after being heavily influenced by the unbelievably fabulous
Jean Power and the work she inspired for the
Contemporary Geometric Beadwork community started by Kate McKinnon, that I recently felt like I needed a bit of a break from structurally impressive beadwork. I didn't start off with this necklace and earrings set in my head. Originally I was going to make an asymmetric and bonkers necklace inspired by Jean's
Marun Bracelet but as I was bezelling all the rivolis, my plan changed and I decided to make something a lot more traditional and basic. I needed some serious sparkles in my life and some old school Hollywood glamour!
I chose silver duracoat delicas for the simple reason that I wanted the rivolis to take centre stage. I did think about other colours, but wanted simplicity of form and background colour to fade so those rivolis really sang.
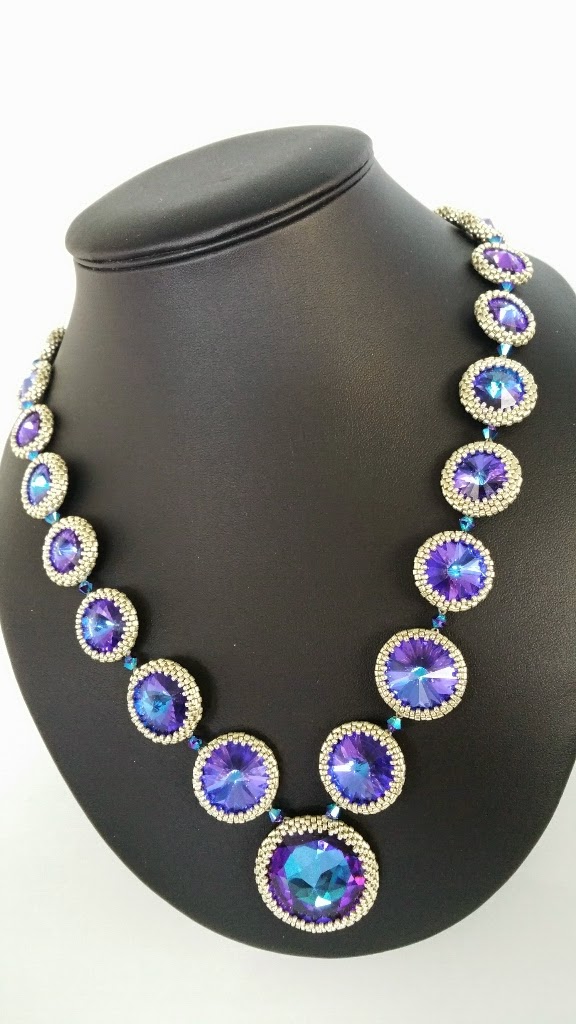
This is what I made:
It's an extraordinarily simple but uber glamorous necklace made using Swarovski Heliotrope rivolis in an assortment of sizes (from 12mm to 18mm), with a 27mm vintage Heliotrope Reverse Fancy Stone as the centrepiece.
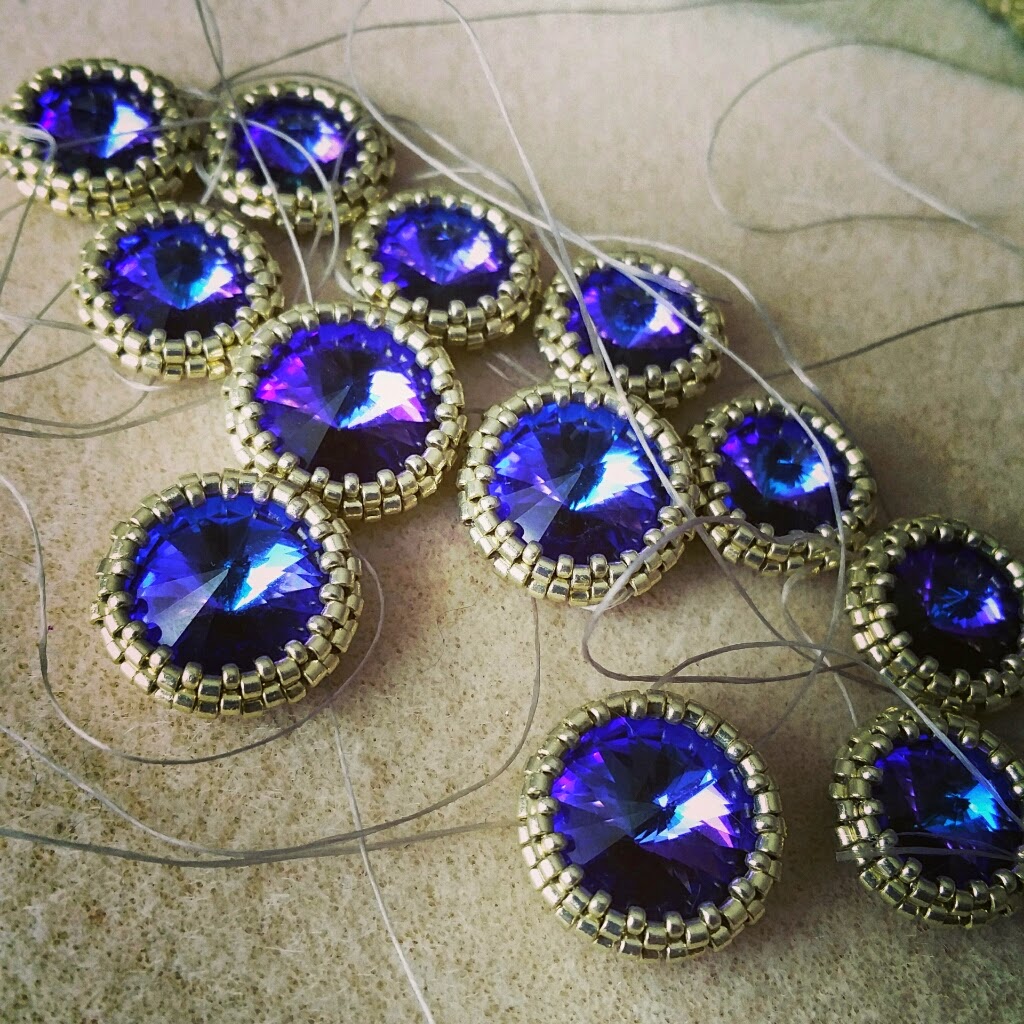
I started by using Jean Power's obvious, but previously unthought of, method of bezelling smaller rivolis (
soooo obvious now she's pointed it out here!)
It felt like a never-ending bezelling job! Although I did find some Swarovski 2AB bicones in my stash that I had utterly forgotten about that went beautifully with the heliotrope rivolis.
I don't think I was even half way finished at this point! (I also really need to do something about how messy my bead tray gets when I'm creating!)
Then came the moment to bead that gorgeous vintage Heliotrope Reverse fancy stone. No picture can do justice to this bad boy! It has some serious sparkle and the colour is just so intense. I love it!
I started joining the rivolis using the bicones. I used 3mm bicones round the back to join the 12mm rivolis and then switched to 4mm for all other sizes.
Halfway there and the threads are starting to be tamed!
I decided to use a sterling silver magnetic clasp on this necklace. Mainly for aesthetics, but also I would be absolutely distraught if someone was wearing it and it got caught in something and ripped - it would be such a waste of a lot of work!
Look at all those rivolis! Sparkles from every angle!
I enjoyed making the necklace so much I decided that I would make a pair of simple matching earrings. I don't often make earrings - generally I find them too small and fiddly - but this time I knew that they would compliment the necklace perfectly.
One earring done...
And finally I made its match. They're extraordinarily simple and pretty plain. I really just wanted the rivolis and the bicones to do the talking.
It is available in my etsy shop here