Monday, 27 April 2015

Ultra Blue Swarovski Triangle Necklace

I've been making so much big jewellery recently that I fancied a bit of a change so I decided to make a pendant inspired by Jean Power's Heroine Necklace.  

This is what I've made.


I bought a 14mm Swarovski Ultra Blue rivoli and used Jean's method of bezelling (not sure I'll ever go back to doing it the old way to be honest!) and then had to figure out the maths to make the triangle even and integral to the bezel.  Lots of trial and error as maths really isn't my strong suit!I used silver duracoat delicas and silver duracoat seed beads in size 15.

The triangle didn't look great until I zipped the edges together and then it became a very solid and firm triangle.  In this shot you can see how I was inspired by the clasp of the Heroine necklace, although this one is solid, rather than being a tremendously clever three way clasp!

I left the back of the rivoli open so that light can travel through it and make it shine.  Also, I quite like the back being blue, rather than the usual silver or gold foil!

I added a very small and simple square stitched bezel and sewed it closed with the sterling silver chain in situ so that it was tight around the chain, not so tight that the chain won't move, but tight enough that it won't slide off the end when putting it on and taking it off.

I hope you like this simple necklace.  It is Available in my etsy shop here.

Tuesday, 21 April 2015

Swarovski Heliotrope Necklace & Earrings

I've been concentrating so much on geometric beadwork for the last few years, after being heavily influenced by the unbelievably fabulous Jean Power and the work she inspired for the Contemporary Geometric Beadwork community started by Kate McKinnon, that I recently felt like I needed a bit of a break from structurally impressive beadwork. I didn't start off with this necklace and earrings set in my head.  Originally I was going to make an asymmetric and bonkers necklace inspired by Jean's Marun Bracelet but as I was bezelling all the rivolis, my plan changed and  I decided to make something a lot more traditional and basic.  I needed some serious sparkles in my life and some old school Hollywood glamour! 

I chose silver duracoat delicas for the simple reason that I wanted the rivolis to take centre stage.  I did think about other colours, but wanted simplicity of form and background colour to fade so those rivolis really sang.

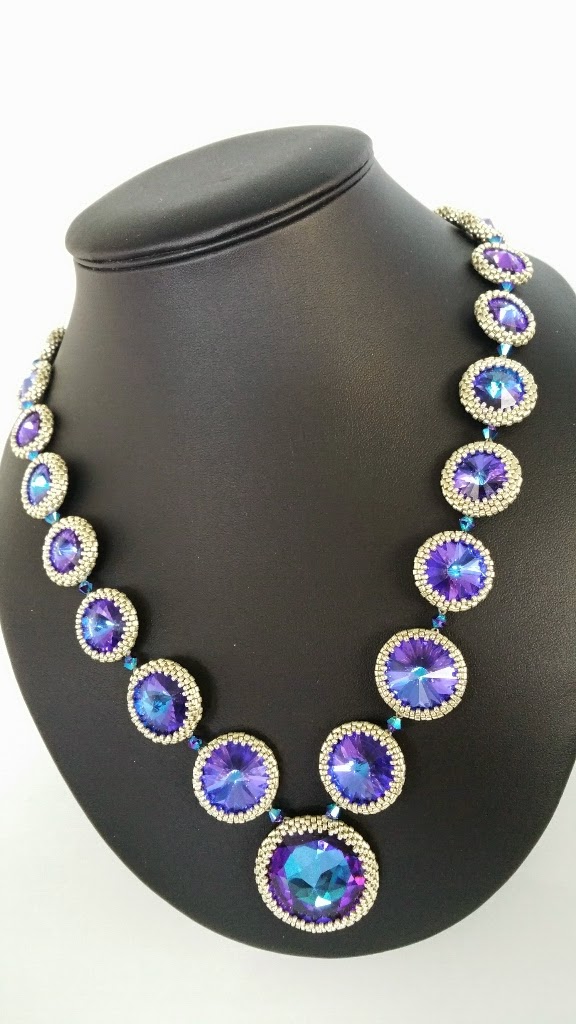
This is what I made:


It's an extraordinarily simple but uber glamorous necklace made using Swarovski Heliotrope rivolis in an assortment of sizes (from 12mm to 18mm), with a 27mm vintage Heliotrope Reverse Fancy Stone as the centrepiece.


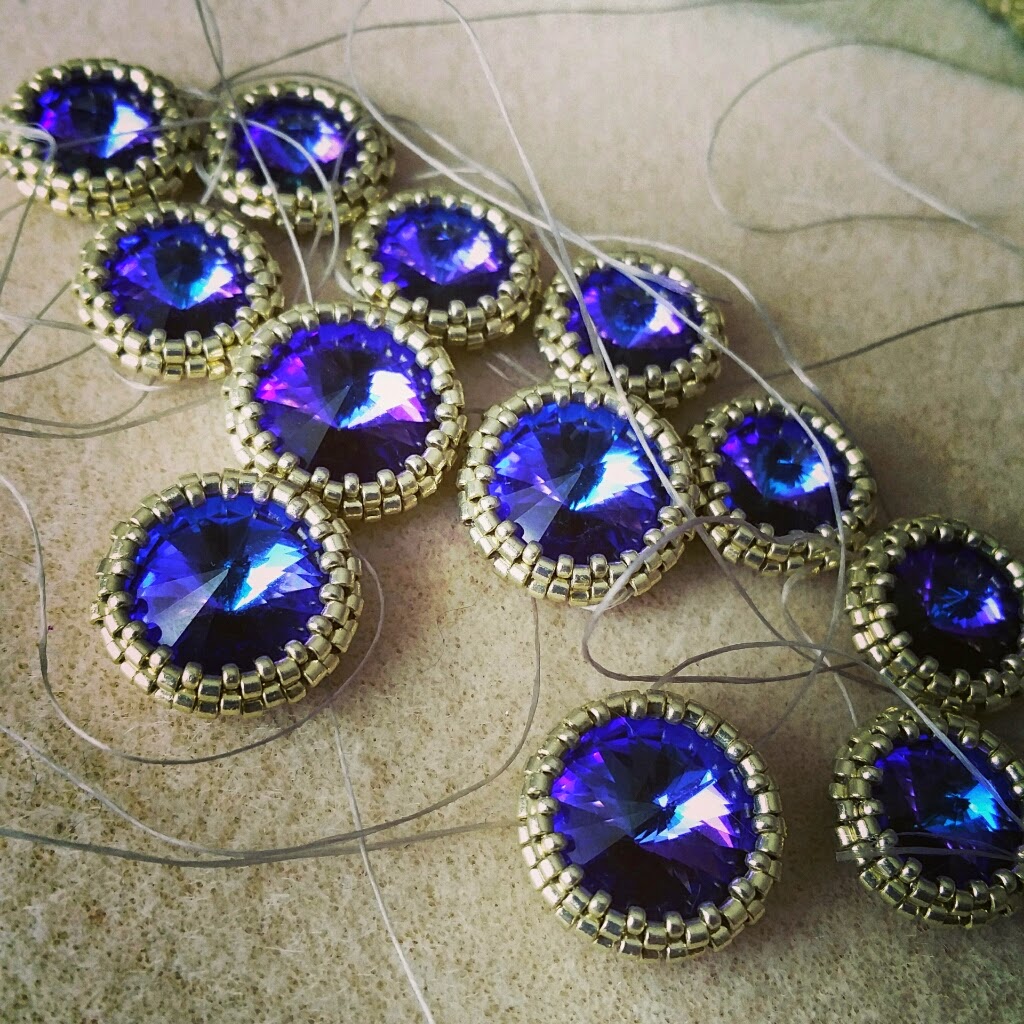
I started by using Jean Power's obvious, but previously unthought of, method of bezelling smaller rivolis (soooo obvious now she's pointed it out here!)

It felt like a never-ending bezelling job!  Although I did find some Swarovski 2AB bicones in my stash that I had utterly forgotten about that went beautifully with the heliotrope rivolis.

I don't think I was even half way finished at this point!  (I also really need to do something about how messy my bead tray gets when I'm creating!)

Then came the moment to bead that gorgeous vintage Heliotrope Reverse fancy stone.  No picture can do justice to this bad boy!  It has some serious sparkle and the colour is just so intense.  I love it!

I started joining the rivolis using the bicones.  I used 3mm bicones round the back to join the 12mm rivolis and then switched to 4mm for all other sizes.

Halfway there and the threads are starting to be tamed!

I decided to use a sterling silver magnetic clasp on this necklace.  Mainly for aesthetics, but also I would be absolutely distraught if someone was wearing it and it got caught in something and ripped - it would be such a waste of a lot of work!

Look at all those rivolis!  Sparkles from every angle!

I enjoyed making the necklace so much I decided that I would make a pair of simple matching earrings.  I don't often make earrings - generally I find them too small and fiddly - but this time I knew that they would compliment the necklace perfectly.

One earring done...

And finally I made its match.  They're extraordinarily simple and pretty plain.  I really just wanted the rivolis and the bicones to do the talking.

It is available in my etsy shop here

Wednesday, 1 April 2015

Esty Sale!

Crikey, I'm having my very first Etsy Shop sale!

All of my items have a huge 15% off if you use the coupon code EASTERPROMO2015 until Tuesday 10th April if you fancy something to make a statement this summer.


Friday, 27 March 2015

Sparkles and Spikes Bangle

In my last post I teased a little...  I said that I'd made something similar but a little more bonkers...

Well here it is:

I call it Sparkles and Spikes and it just makes me laugh every time I look at it because it was such an unbelievable joy to bead! Horns, wings, rivolis suspended in mid-air? Yeah baby, it's got it all!   It's a bit of a bugger to photograph though!

As you can see, I kept the pallette pretty simple, using only silver lined crystal and silver lined smoke delicas to complement the Swarovski rivolis in black diamond.

Starting with a simple MRAW band of 84 units, I increased the plain silver mid section into horns with enough space between them for the rivolis to sit quite happily between them.  Then I turned my attention to the smoky wings and increased them just enough so that , using one of the beads in the bezel as the tip of the wing both top and bottom, the rivoli would hang there, away from the bangle.  I wanted them to be close to the tips of the horns but not quite as far out - mainly to give them a bit of protection but also so that the horns attack first!  Surprisingly, the wings are exactly half the number of rows as the horns, even though they look so very much shorter to me.


The inside of the bangle is nice and smooth on the inside.  It's pretty stiff and solid but squishes down just enough to get it over the hand - phew!

I do hope you like it and that it makes you laugh as much as me!

It is available in my Etsy shop here.


Friday, 20 March 2015

Golden Chocolate Rick Rack Bracelet

Oh my goodness it's been a while!  I didn't quite realise just how long it had been though!  Ooops...

Anyways, I have been incredibly busy with my needle, thread, beads and a smattering of Swarovski rivolis and am pleased to show you my latest bracelet:


As you can see, I used Jean Power's amazing Rick Rack pattern, started off by using the incredible Contemporary Geometric Beadwork MRAW start.  As this isn't the first Rick Rack bracelet I've done, I also made the Double Layer Rick Rack bracelet last year, I noticed that those delicious v shapes could be perfectly filled using Swarovski pear shaped crystals.  This got me thinking....


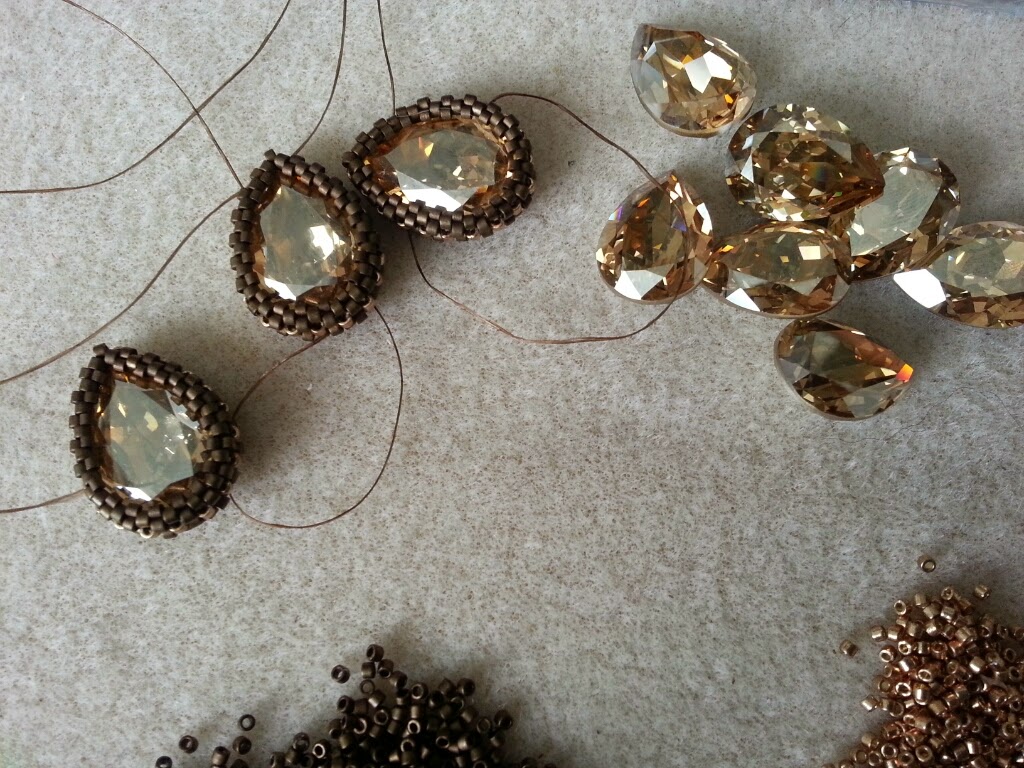
I used MRAW to bezel the Swarovski crystals (I used 18x13mm Pear Fancy Stones in Golden Shadow), which was surprisingly easy on the hands.  The stones didn't pop out or misbehave in any way whist I was beading - highly recommend using this method of bezelling!


I used delicas in Dark Bronze Matte and Galvanised Light Champagne Duracoat for the front.  I used the champagne for the ladders in the MRAW on the stones so decided to echo that in the main bracelet as well and then do a zigzag stripe of the gold to really draw those crystals into the design as a whole.


As you can see in this shot, the bracelet is double layered.  It could work single layered but I think that because I decided to use the bigger crystals, the body needed to be much more sturdy than a single layer.  I'm a tight beader and even one layer of rick rack is pretty strong but I really didn't want this bad boy to buckle over time with lots of wear! The reverse of the bracelet is just plain matte dark bronze as there was no need for there to be any ornamentation as it generally won't be seen.

It was finished with a simple gold slide clasp, the loops of which were securely attached and hidden inside the bracelet to give it a fully finished and sleek look.  


I must admit that I'm really proud of how well this bracelet turned out.  It sits really closely to the wrist (well, mine anyway!) and looks quite chic and elegant - not my usual style at all! It is exactly what I imagined when I first put needle and thread to beads - that never happens! I hope you like it too.


I've also finished another bangle that's along these lines but a teeny touch more bonkers - I'll blog it soon!


Wednesday, 20 August 2014

Tangle Of Angles Bangle

Whilst I was off work, apart from the Raven Star Bangle, I also started another bangle. I decided to go way out of my comfort zone and make something out of colours that I personally never wear, silver lined bronze and gold lined cream.

 I call it the Tangle Of Angles Bangle because as I was making it, I decided to really push myself on the number of horns and gave it 14!  The most I'd ever done before that was 12 and my goodness it was such a tangle to bead!  The beadwork decided to be such a tangle that it was an absolute horror to bead and took about four decreasing rounds (and an obliging can!) for it to become round and bangle shaped.
 I also decided to add in an Elegant Guide Round (video) that Kate McKinnon came up with, which I hadn't played with before.  Even though I didn't embellish the EGR in any way, I am a definite convert to this technique and will never stitch in the ditch again!
 After I did one side with the EGR, I just suddenly lost interest.  My stitches had reopened and I just couldn't face doing any more beading for a few weeks so my amazing Mummy finished it off for me. 
 I think that going with the zigzag edges really completes the piece.  I always tend to go with straight edges or wings but I wanted to try something a little more elegant this time, lending itself to the colours (get me trying to do grown up beading!).

It is available in my Etsy Shop

Friday, 4 July 2014

Rainbow's Revenge Bangle

Yesterday, I finished the Rainbow Reverie Bangle, today I finished a bangle in the same colours but with a much more vicious look which I have called Rainbow's Revenge.


As I was beading up the Rainbow Reverie, I had an idea to put something in the ellipses between the wing joins.  I had hoped to put in some dyed howlite skulls but unfortunately I got my basic band size wrong so that had to go back into the thought processes for a little more stewing and I went back to my bead stash and found that the skulls had come with some absolutely fantastic dyed howlite claw spikes.


I just thought, hey, why not?! and started adding them.  Blooming tricky though - the more spikes I added, the more the thread caught on them!


 I love that the inside edge is the same as the Rainbow Reverie but the whole look has changed by the addition of those funky spikes!

 From the top you can see that the bangle is actually quite slender - the spikes are what give the bangle depth and punch.

I know it won't be to many people's tastes, it is pretty outrageous, and quite heavy, but I love it!  I love that it is bonkers and that the person who ends up owning it will never be able to type wearing it - or do much of anything practical!  It's a statement and it is totally unapologetic and that's what I like about it so much.  It is what it is and doesn't make any bones about it!

It is available to buy in my Etsy Shop

Wednesday, 2 July 2014

Rainbow Reverie Bangle

So I decided to make something with a little bit of colour.  As you know, I'm not good with colour at all and tend to steer clear, but I just wanted to really go for it, like I did with the Jester Cuff.  I didn't want to emulate it, more create a sibling for it and this is what I came up with:
 Originally I wanted to nestle dyed howlite skulls in each of the ellipses but I made the wings too long and the bellyband too thick for it to work.  I still have the beads on my tray though so...

I love how the view from the top looks so utterly simple and undulates so smoothly.
 
 And it was my first foray into using the luminous delicas.  They're a bit fab and very bright (you can't tell in this picture how bright that pink is, you'll just have to trust me!).
 Each wing tip is joined and the whole structure is extraordinarily solid. 

I hope you like it.

Available in my Etsy shop here.

Friday, 13 June 2014

Raven Star Bangle

My most recent make is a bangle that has been more therapeutic than anything I have ever made before.  As I have previously mentioned, I went into hospital to have a lump removed from my breast.  Unfortunately the wound got infected and my stitches burst, which has been rather difficult.  Luckily I have had the most amazing support from my family and my other half, they have been so superbly strong and marvellous.  All is good now, I'm just healing slowly.

I decided to take advantage of the recuperation time spent off work to make a study in form, eschewing colour and concentrating solely on what I could make the delicas do. 

Rather than make a usual start of an MRAW length that would be the smallest part of the bangle, I decided to push myself and made a zigged MRAW chain that would become both the tips of the horns and the very inside of the wings where the spines were 2mm cubes:

As I decided to do the whole bangle in gunmetal (simply because I had the most beads in that colour), each zig and zag was marked with a tie of white Nymo so that I didn't lose myself when adding in the next row.  It was huge - 174 MRAW units!

Slowly I added rows and rows of gunmetal delicas and it started to change its form, almost looking like a Zig Wing by Kate McKinnon.  Then I turned my attention to the other side and it slowly started to open up, like a flower:

The more rows I added, the more the form became apparent.  It was working!


As it opened and both sides began to have the same number of rows, it really started to lie flat and become, not what I had imagined but what it needed to be.


It is certainly big and takes no prisoners!  I can't imagine that there will be many that actually like it but that is okay, good even.  This bangle is a symbol of strength, and whoever does decide that they like it and wants it then I hope they feel as fierce and as strong as I felt when I was making it.

It is available in my Etsy shop here

EDIT: I just received the most wonderful screenshot from Kate McKinnon - it is being included in Contemporary Geometric Beadwork Volume II and I have contributed the pattern to the Pattern Library so you can make your very own!  I'm so excited!