Friday, 25 April 2014

Mummy's Crystal Triangle Earrings

Once again, Mummy is the creator behind the pieces in this post (I really need to get more beading time in!).

Inspired by the most marvellous Jean Power and the triangles she is famous for, Mummy decided that she wanted to see if she could use the triangles as a bezel in which to hide some delicious little Swarovski rivolis.  Of course, she couldn't stop at the making of one pair of earrings, so made three!


How sweet are these gorgeous little earrings?!  Unfortunately, the light was rubbish (blooming England in Winter) so you can't get the full delight that these earrings are.  The back side is a simple triangle and then decreased around the front, using 3mm rounds at each point, which helps stop the rivoli wriggling about in it's triangular cocoon, and then sparklied up with a picot edge in 15s.  I love this set in gunmetal and steel with the smoky grey rivoli.  Very me!


Isn't it strange how a different colour can change the whole look of a piece?!  The exact same pattern as above, just with shades of pink yet they look so delicate and girly and definitely not something that I'd wear (sorry Mummy!).

And then again, with black and dark red.   These look quite gothy compared with the more industrial gunmetals and the girly pinks.  I love them!

 like how the rivoli is completely encapsulated at the back, reducing the risk of the point being knocked off and ruining the whole earring. Also, how different these earrings look just with a change of colour.  It always astonishes me that colour plays such a huge part in the whole feel of a piece, even something as small as a pair of earrings.  I shouldn't be so surprised but because I'm rubbish and generally have my go to colours, I always am!  If Mummy had just shown me the pink set, I would have been impressed with the construction, but never in a million years thought they were my bag, yet the exact same earring in the gunmetal and steel may simply have to find their way into my jewellery box!

Friday, 18 April 2014

RAW Heart

Mummy's proper on one with creating new patterns!  After the stars and seeing the Sweet Hearts that Sabine Lippert made, Mummy decided that she could shift the techniques that she learnt on using the sizes of the beads to for the shapes onto cubic RAW.

Off she set, with a simple desire to make a heart.  Rather than using sizes, she decided to continue with the way she was going on the stars and used numbers of beads instead and this is what she came up with:

Isn't it the loveliest and most deceptively simple looking thing you've ever seen?!  On the side like this you can see the inner CRAW construction and the fact that she went with matte bronze along the inner side of the heart and shiny bronze along the outer edge, a perfect complement to the silver lined emerald.

The heart was simply hung on a silver chain using a jump ring through one of the units.

Pretty work Mummy

Friday, 11 April 2014

More of Mummy's Stars!

A couple of weeks ago I showed you the astonishing Stars Necklace Mummy made.  Well she couldn't just stop at a necklace now, could she?! 

Below are two sets of earrings she made using the very same pattern, just with very different looks due to the colour choices, construction and the bead choices.

These grey mismatched earrings are fantastic.  Although this photo doesn't quite capture their full glory, the dark insides and light outsides really does stand out against the pale matte grey of the rest of the stars.  I love mismatched earrings and these are just brilliantly fun.


Below you can see how very different the stars look when made of delicas.  To me they become much more angular and rigid looking (and are a lot more difficult to bead!).  They look much more striking in this medium sized star and have definitely lost the dreaminess that the 15s lend.  Where the earrings above are bigger and crazier, they are also more ethereal than the smaller, simpler single stars made from delicas.

Both are beautiful, both make me so proud of Mummy for thinking up such a fantabulous pattern, I just think I prefer the dreamy and less angular look that 15s give.  Quite a shock, considering that I usually prefer quite vicious and angular looking jewellery!

Friday, 4 April 2014

My Sister's 40th

Last year my big sister turned 40 (although she looks in her 20s, the cow!).  I decided to make her a little something special for her birthday present.  Something that she could wear to posh parties as a set or earrings for when she wanted to sparkle only a little.
Unfortunately I don't have a better picture than this so I'll have to talk you through what I did.

First of all, my sister is a gorgeous brunette with the most dazzling brown eyes that range from almost amber in some lights, to deep chocolate it others.  She loves gold so I decided that the base colour should be Metallic Earth Batik Gold Iris (DB1010), using purple iris Charlottes as the detail and the stones are Swarovski in Amethyst. 

First I bezelled the stones with the delicas and the charlottes.  Around the large stone I "stitched in the ditch" to add an extra round of peyote and then a simple picot edge with the charlottes before adding a very simple bail and suspending it on what has to be my most perfect herringbone rope ever!

The earrings were simply bezelled and then hung on solid gold ear wires.  No frills around the edge so that she could wear the earrings with anything and so that they didn't distract too much from the large oval stone necklace.


It's simple and understated but I like it and I know she does too.


Friday, 28 March 2014

Mummy's Crazy Psychadelic Pyramids On Acid!

You may remember my Pyramids Cuff from a while back, the pattern I gave to Kate McKinnon and was chosen to go into Contemporary Geometric Beadwork vol.1? Well, Mummy decided that she wanted to have a go at this pattern and gave it her very special spin!


First of all she tried making a pyramid that faded from dark pink at the tip to pale pink at the base but had to stop because it looked so much like a boob that I couldn't stop snorting and giggling!  Yes I am a grown up!  Clearly some colour ways just aren't good for pyramids!

Instead, she decided to have a nose through my delica stash and her eyes very quickly alighted on my duracoat galvanised delicas. The witch!  She loves bright colours and the duracoats made her squeal with delight.  Luckily she decided that the underneath of the pyramid should be a plain colour so as not to wear off the colours underneath.  She chose a simple smokey grey delica for that.


The colours must have reminded her of growing up in the 70s because she decided to set herself quite a challenging pattern of turquoise and orange spiraling out of a pink base.  Quite possibly the maddest thing I've ever seen but I blooming love it!  The crazy pattern with the crazy colours just work and can't help but make you feel as though it's a bright summer's day and the sun is shining and all is groovy with the world!
As you can see, she chose some bright Swarovski rounds in turquoise to join up the pyramids, with an orange delica between the two.  Her pyramids are a lot smaller than mine and a lot busier so she wanted to leave a bit more of a gap between them and I think it really works!


And finally she decided that a square base for the clasp would work a lot better than the triangle that I made. 

I love it!  Crazy and happy and all round mental.  FANTASTIC!

Wednesday, 19 March 2014

Seeing Stars Necklace by Mummy

Mummy has done something rather glorious and unbelievably glamorous, not to mention quite technically difficult!


How astounding is that?!  Each of those stars is made in tiny size 15s!

First of all she played around with all different ways to make the stars and settled on a peyote tube that's zipped up on the outer edge once finishing.  To be honest, I really don't know how she has the patience because even though it took her a good few weeks to get the star pattern right with all the increases and decreases, she never lost sight of what she wanted to achieve.  I must admit that I would probably have used an MRAW start for the inside and tried to figure it out from there but she wanted all peyote - crazy lady!!!


After a while she gave me the pattern to have a try with as she wanted to see how easy the pattern was.  I gave it a go in delicas and although it was okay, it just wasn't as good as in Czech seed beads.  Even Japanese seeds were a bit too square for this pattern whereas the Czech doughnut shaped beads worked a treat.  Mummy made up the pattern in all different sized beads (including 6, which was mental!) and we both decided that 15s were just beyond perfection.  Then it was time to try different sizes.  Who says a maths degree isn't worth it?!  Goodness knows how she did it, but she put that mathematical weirdness in her brain to work and out came the formula for all different sized stars!


She decided that she didn't want to go for the silver/grey type usual star colours, rather leaning towards earthy tones for this necklace, so we went through our respective stashes (and did a bit of shopping!) and came up with a bunch of colours that she wanted to use.  That's one of the things I love about my Mummy, I would have either gone for silvers and sparkles or really acidic opaques but Mummy decides browns, blues and greens are the way forward.  With stars.  Bonkers.  Perfect.


I love it beyond loving it (and wish it was mine!).  Even though it's a big looking necklace, it weighs less than a whisper and doesn't jab or prickle or irritate in any way.  I've been told that if I want one I have to make it myself though.

Bah!

Friday, 14 March 2014

Sabine Lippert's La Fleur Bracelet

I've done a Sabine Lippert pattern before (her Sweet Hearts pattern - these earrings beaded by Mummy) and found them easy to read and thought I'd give myself a bit of a challenge for a Christmas gift for one of my staff.  After much deliberation (and I mean lots - Staff 3 is a delicate young thing and is girly in ways that I'm just not so this was a massive challeng!) I decided upon Sabine's La Fleur Bracelet (found in her book Beaded Fantasies).  As I've never really made anything like this, and Staff 3 is a delicately coloured redhead I played it safe and used turquoise and bronze as the colourway.

The bracelet is made up of these darling little flowers made with 8mm Swarovski chatons (an absolute bugger to source in this country!) and tiny 3mm Swarovski bicones, with mainly size 15 seed beads!  I've put a 50p next to the flower so you can see how small these blighters really are!

I made what seemed like a bazillion of the flowers - each one with thread left on, as you can see in the picture, with which you do the most sublime links with (Sabine really does take care that even the bits of the work you don't see are as beautiful as the bits you do).

Then it came to joining them together and working out if I needed to do another flower or if it was long enough.  The pattern calls for 9 flowers (if I remember correctly), but Staff 3 is a tiny little thing so she needed only 8 flowers.  Which is a good thing as I'm not much of a component maker - I get bored!

The finished bracelet.

All in all, it was a nice make.  Not difficult by any stretch of the imagination, just blooming fiddly!  I think I got through 2 or 3 needles per flower, and definitely needed my pliers on more than one occasion for pulling the needle through.  It was a complete change of direction for me, the instructions were clear and concise and Sabine explains things very simply. It's not something I would wear, but I think it looks lovely on Staff 3 and I know that she likes it, which is what is important in a gift after all!  I did buy another colour of chatons and matching bicones that would go with steel/gunmetal seed beads but I think it'll be a long old while before I make this pattern again.  Life is far too short to repeat the same patterns when there are so many to try, as well as so many ideas in my own head!

Monday, 10 March 2014

Ombre Cabouchon Necklace

Real life has kind of taken over recently, in a very wonderful way, which has meant slightly less time to bead.  I'm beginning to get back on the beading wagon, with ideas falling out of my head and onto paper.  Until they get to needle and thread time, I thought I'd show you something I made late last year.

I was given a commission before Christmas to make a simple necklace with a layered onyx cabouchon and a simple ombre chain.

The lady I made it for wanted it as a gift for her Mum and she chose the cab, as well as the colours and the base design.  She wanted the colours to bleed into each other and the clasp had to be beaded as well, as her Mum doesn't do well with any metals.

This is what I was given to work with - she wanted black to be the predominant colour in the chain with just a small bit of white showing either side of the pendant dropper:


My first step was to bead the cab. A nice easy job, but for my own hatred of matte beads - the more you handle them, the less matte they become (oils in skin etc) and they really bugger up the thread!  I'm used to working with quite a lot of thread but have to use much smaller lengths as it frays more due to the rougher bead surface.  The trouble is, matte beads really do lend themselves to many projects, and the matte beads against the highly polished surface of the stone was just beautiful.

Then came the rope itself! We opted for a simple 6 round herringbone rope, not twisted, not lazy, just a simple rope.  This made the bleeding of the colours really work and although you can barely tell that the pinky pale brown turns into silver before heading into white, I really like this for the effect. 

Here you can see the rope width against the cabouchon.  Not too clunky and thick, but not so delicately thin that the cab looks ridiculously chunky!  To be honest, it took a little while (and lots of samples!) to settle on this width because although I liked the eight round rope, it would have been far too chunky for the lady in question.  I also always tend to veer towards the large and chunky rather than the thin and delicate.


Getting the rope even on both sides, but still random looking was an absolute nightmare! Not a very good picture below, you can see the warped square found in Geometric Beadwork by Jean Power that I used to hang the cabouchon.  Because we only wanted a small amount of white beads to peep out either side on the rope, I thought Jean's ingenious design was the way forward.


And then we moved to the clasp.  The loop is a simple peyote circle that I beaded and then joined the herringbone rope to and the toggle has a loop that loops through the continuous herringbone loop on the other end of the rope.  I prefer to make my beaded clasps like this rather than a simple loop and toggle (or bigger bead) joined by a few beads because it makes them look a little more interesting and a touch more finished.

The completed piece:

I know the lady's Mum liked it Christmas morning and I hope you do too!  It's very different from all the geometric work I've been doing recently.

Sunday, 12 May 2013

Double Layer Rick Rack

It's been aaages since I last blogged.  Probably because it's taken me a good long while to make my newest bracelet!

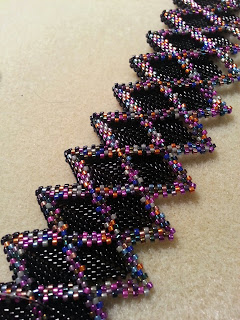
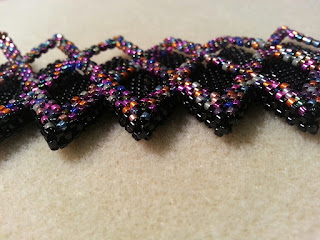
As you know, Kate McKinnon recently released the amazing Contemporary Geometric Beadwork, an absolutely astounding book which I reviewed here and which you can buy here (USA) and here (UK).  I loved the zigged MRAW band so much, and after seeing Jean Power's absolutely exquisite Double Rick Rack in her book, Geometric Beadwork, which I reviewed here, and I just knew I needed to put the two together!  Jean shows how to do a flat Rick Rack, which is what I wanted to make, rather than a bangle.  I wanted this cuff to sit close to the wrist and her method of turning was so elegantly simple that I was quite frankly blown away!

I decided I wanted to use a black opaque background and then use a really bonkers mix of galvanised delicas.  I literally got all the duracoats  I had in my stash and mixed a great big dollop of beads (which I'm really not looking forward to separating out again).

Here I am after only a few rows of beadwork on each side.  Using the zigged band was fantastic because it meant that the sizing was pretty accurate even after just making that. I was a bit dippy doing all of the MRAW in opaque black though - when I was joining the two layers at the end, it sent me quite cross-eyed trying to follow where I was!

I had a hell of a time doing both layers together though, the thread wanted to wrap itself around all those gorgeous points pretty much every stitch I made.  I really ought to figure out a better way of keeping my thread out the way!

In this picture you can see that the top open layer just wanted to go every which way! 

And then I was done - finally!  The bracelet from the back looks quite dull in this photo but in real life you can really see how the beads change direction and the difference in the way the light behaves off their surface.  I like that this bracelet could be worn this way, as although it doesn't really pop with colour, the direction changes and the overall thickness gives it quite the impact.

I sewed through the turn beads on the ends and all I did was attach jump rings and a slide catch.  To be honest I may change the jumps to something slightly smaller so it sits a tiny touch tighter on my wrist but they were all I had to hand when I was finishing up this evening.

And  here is the finished bracelet, face on.  Hope you like it.

Saturday, 30 March 2013

Contemporary Geometric Beadwork Volume I by Kate McKinnon

Guess what arrived through my door at the back end of last week?  Oh yes, the amazing new book by Kate McKinnon - Contemporary Geometric Beadwork Volume I

 And would you look at that?!!  My Red Many Horn had the honour of becoming one of the swag postcards!  Crikey!

 Inside the book is signed by Kate and just opening the front page made me practically squeal with delight at how crammed full this book is!  Seriously $40 (£26.30 for real money conversions!) is nothing for how much is in this book.  The 200+ pages practically burst forth with knowledge and unbelievable beadwork on every page!


I love that the very first part of the Basics section is titled "Yes You Can!" because to a new beader, or a beader that hasn't played with peyote stitch very much, it probably would look quite intimidating.  The fact is that we're taken from the very basic of shapes, through to amazing complex structures in a logical, well thought out way and if you were a beginner, you could start at the beginning and simply work your way through the book, from basic flat triangles, through power puffs (a la Jean Power - remember this book is inspired by her work), meandering through wings, horns, zigs, zags to the awe inspiring dizzy heights of the Fortuneteller Bangle before ending on beautiful cones. 

Each page is thrillingly illustrated with all sorts of colour combinations and project step outs that make me gasp in bewilderment at the beauty of the piece and the mind of it's creator. Some of the colours used are breathtakingly beautiful and others I would never have put together in a million years, yet sing together.  Each page is an inspiration.

Peppered throughout the book are these beautiful "Pearl Of Wisdom" boxes - and they really are!  I love these little boxes so much - they explain complex ideas simply and convey excellent advice in areas that cause the most pickles.  Love love love!


Of course, I'm slightly biased in that a happy accident brought my work to Kate's attention.  Way back last summer I sent some works to Jean for the book (before one book became two), Jean sent those pieces, including my Pyramids Cuff to Kate.  Kate put it up on the Facebook page saying how much she liked it and the response from the community was overwhelmingly supportive.  I offered the pattern for inclusion and it got in!  To see my actual name in print was pretty awesome, especially after being so lucky to see my name next to the beaded beads I made in Jean's book! 


 My Red Many Horn looking amazingly surreal and perfectly Queen of Hearts in this Alice In Wonderland style picture!


Further on in the book you can see the Pink Pinstripe Ruffle Cuff that I made and sent to Kate.


Below is a list of the the people who contributed and beaded - the whole project felt like Kate was the captain of a huge (and probably rather unwieldy!) ship, flinging out ideas and little nuggets of advice that we all fed upon and made our own and passed back to her for approval and all was approved, every item was greeted with absolute pleasure and amazement which spurred the whole community on to further amaze and delight.  This book is not just a static book but simply a snapshot of what is evolving on the eBook (password protected) and on the Facebook Page (just click "Like" to join this thriving and vibrant community and enjoy the delights as they are created).  It is thoroughly bizarre and utterly wonderful the way this is an open source project.  Join, get the book as a souvenir but come and get involved in this project, you'll find that you are so much more capable than you ever thought possible.  I have.

And this is the author picture of the lady herself.  Wearing a crown, naturally.

Wednesday, 27 March 2013

Rainbow Jester Bangle

So this is my most recent make:
It is pretty much the only thing that I've been working on since I moved into my new home.  I wanted something bright and a little bit bonkers to reflect the celebratory mood I have been in since we moved here!  I also wanted to try to tackle my fear of using lots of colours.  I have seen so many amazing pieces on the Contemporary Geometric Beadwork Facebook page that take full advantage of clever use of colour that I thought it was about time I jumped in and joined the joy!

As you can see, I went for easy colour choice because I know my limits and didn't want to end up spending weeks making something that I hated!  I will get there though!


I adore the black and white stripes that almost look like they could be Square Stitch - they're not, everything but the MRAW bellybands are made using peyote. 


I'm super glad I used some black magatamas to finish the horns off - they made me chuckle to myself because they change the look of the horns from quite aggressive looking (as in the Red Many Horn) into chipper, playful peaks.


The spots of colour, however, are my absolute favourite part of this bangle.  Yes they may just be a tiny part of it, but they really do join the wings, the stripes and the horns together into a whole.  I think if I'd left the wings plain black (which I was very close to doing) then it would have felt much more disjointed and possibly would have lost it's playfulness.  Playful happiness is what I needed this piece to be - it's a celebration after all!