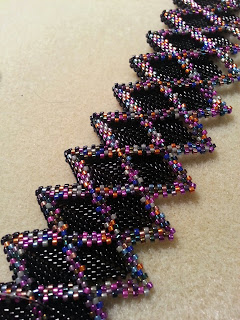
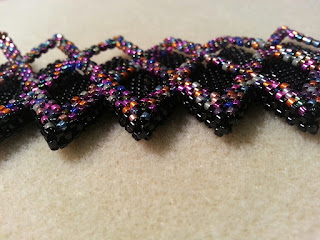
As you know, Kate McKinnon recently released the amazing Contemporary Geometric Beadwork, an absolutely astounding book which I reviewed here and which you can buy here (USA) and here (UK). I loved the zigged MRAW band so much, and after seeing Jean Power's absolutely exquisite Double Rick Rack in her book, Geometric Beadwork, which I reviewed here, and I just knew I needed to put the two together! Jean shows how to do a flat Rick Rack, which is what I wanted to make, rather than a bangle. I wanted this cuff to sit close to the wrist and her method of turning was so elegantly simple that I was quite frankly blown away!
I decided I wanted to use a black opaque background and then use a really bonkers mix of galvanised delicas. I literally got all the duracoats I had in my stash and mixed a great big dollop of beads (which I'm really not looking forward to separating out again).
Here I am after only a few rows of beadwork on each side. Using the zigged band was fantastic because it meant that the sizing was pretty accurate even after just making that. I was a bit dippy doing all of the MRAW in opaque black though - when I was joining the two layers at the end, it sent me quite cross-eyed trying to follow where I was!
I had a hell of a time doing both layers together though, the thread wanted to wrap itself around all those gorgeous points pretty much every stitch I made. I really ought to figure out a better way of keeping my thread out the way!
In this picture you can see that the top open layer just wanted to go every which way!
And then I was done - finally! The bracelet from the back looks quite dull in this photo but in real life you can really see how the beads change direction and the difference in the way the light behaves off their surface. I like that this bracelet could be worn this way, as although it doesn't really pop with colour, the direction changes and the overall thickness gives it quite the impact.
I sewed through the turn beads on the ends and all I did was attach jump rings and a slide catch. To be honest I may change the jumps to something slightly smaller so it sits a tiny touch tighter on my wrist but they were all I had to hand when I was finishing up this evening.
And here is the finished bracelet, face on. Hope you like it.


Oh ja, es sieht super aus!
ReplyDeleteLG Bärbel
Vielen Dank für Ihre freundlichen Kommentar :)
DeleteI really like this beautiful bracelet! It looks like something that is very easy to wear, casual or dressy. I can just imagine the challenge of attaching the galvanized piece, but what a cool result!
ReplyDeleteThanks very much :D
DeleteYep, I was advised to make both bits together, building them up at the same time and it was sage advice indeed as I'm sure it would have been far more difficult to attach each on afterwards!
Es sieht sehr schön aus.
ReplyDeleteDanke :D
DeleteThis bracelet is amazing. Bet it looks even better on real life.
ReplyDeleteI had to try it also.
Great work.
Thank you so much and I'm glad you had a go making one as well! :)
DeleteWunderschööööööne Arbeit,kann nicht so schwer sein ,werde es aauch probieren....Viele Grüße aus Deutschland
ReplyDelete